Sourdough Sandwich Bread
This post may contain affiliate links.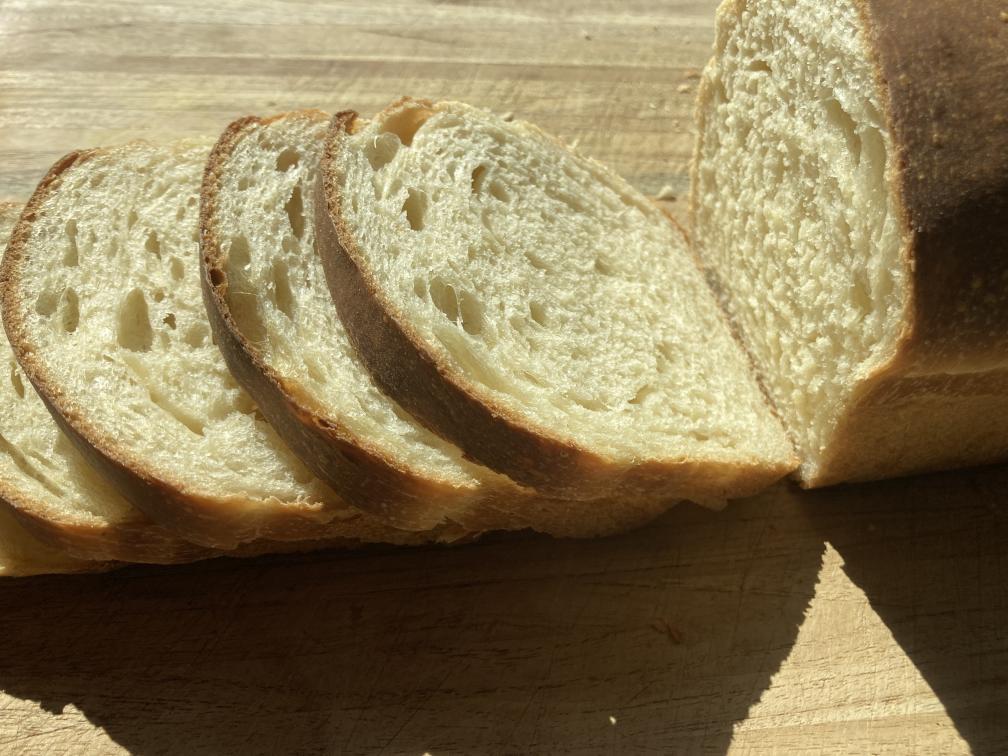
This is a super soft and fluffy sourdough sandwich bread recipe. Make some tasty sandwiches for picnic lunches or toast!
Alterations
- Honey can be replaced for sweetener of choice. It can also be entirely removed. I like the little hint of sweetness that the honey provides without being too overwhelming.
- For ease, you can add the salt when you first make the dough instead of seperating it out into another step.
Tips
- Allow enough time for the dough to rise during the proof before baking.
What are the timings?
- 1:00 pm: feed starter
- 7:00 pm: mix dough
- 8:00 pm: autolyse
- 8:30 pm: stretch and fold
- 9:00 pm: stretch and fold
- 9:30 pm: stretch and fold
- 8:00 am(next day): shape and second rise (proof)
- 12:00 am: bake
Step by Step Instructions
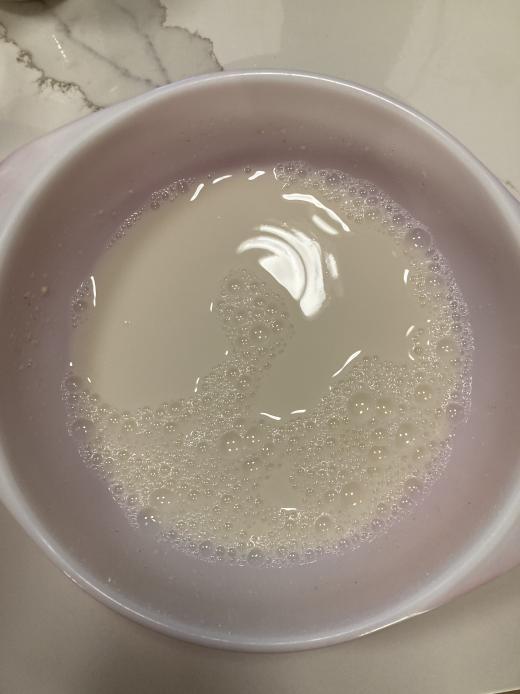
1. Feed your starter
I recommend a 100% hydration starter for this receipe. This means equal parts water, flour, and beginning starter, a 1:1:1 ratio. I feed mine 10g rye, 70g all-purpose, 80g water, 80g starter.
2. Mix your dough
Once your starter is at peak, bubbly, and doubled in size you will make your dough. My starter takes about 5-6 hours. This is going to vary depending on the temperature of your home.
For your dough you can use a ceramic, Pyrex, glass, or stainless steel bowl. I like to use a glass bowl.
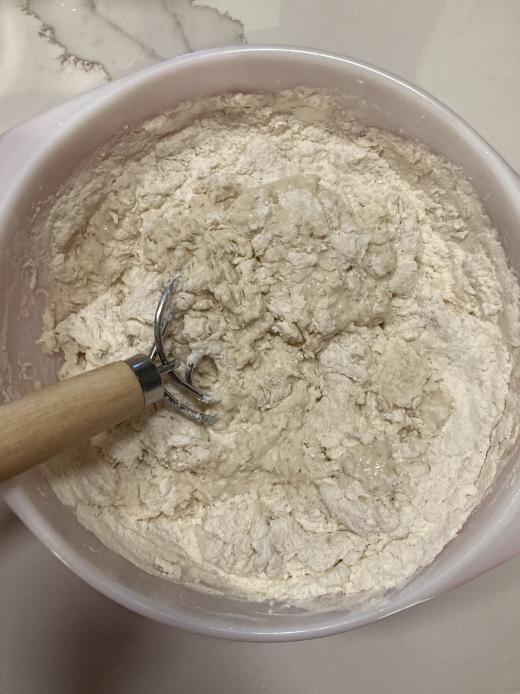
Measure and mix 90g starter, 270g filtered water, and 1 tablespoon honey in a mixing bowl. Make sure that the starter is well mixed, this step is crucial for an even crumb. Feed your leftover starter and put in fridge or counter for next use.
Measure 450g bread flour, add to bowl and mix. The dough will be sticky and shaggy. Measure 2 tbsp butter and cut into cubes over the bowl. Use your hands to knead and incorporate the butter. It will soften and combine as you mix. Knead until all butter if fully dissolved.
Measure 10g salt and either pour over the top or wait 30 minutes and add to mixture. I prefer over the top, the salt will start sweating and makes it easier to mix into the dough.
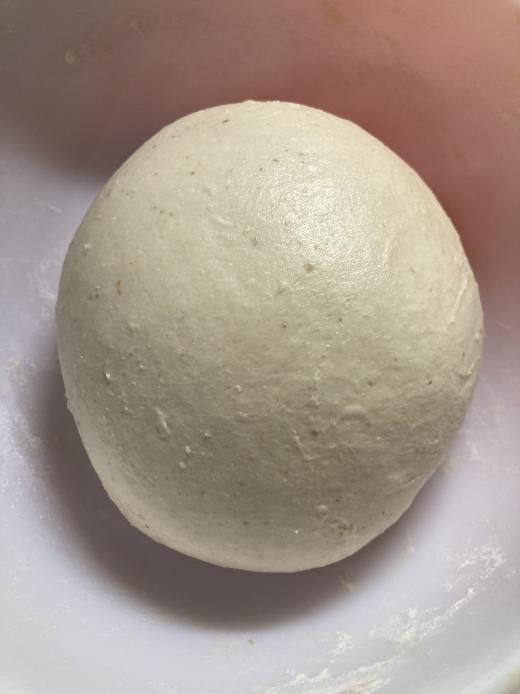
Cover bowl with lid or damp towel and let sit for 1 hour. This stage is called autolyse.
 |
 |
3. Autolyse
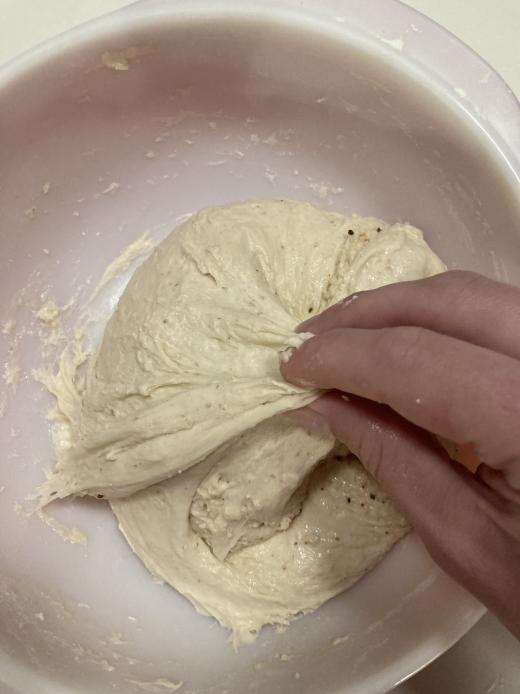
After 1 hour, mix the salt into the dough. Don’t try to over knead it, just until you don’t feel salt on your fingers when you touch the dough.
At this time, get the temperature of your dough with a thermometer. It will be a little warmer since you have just worked it with your hands.
Cover dough and let sit for 30 mins.
 |
 |
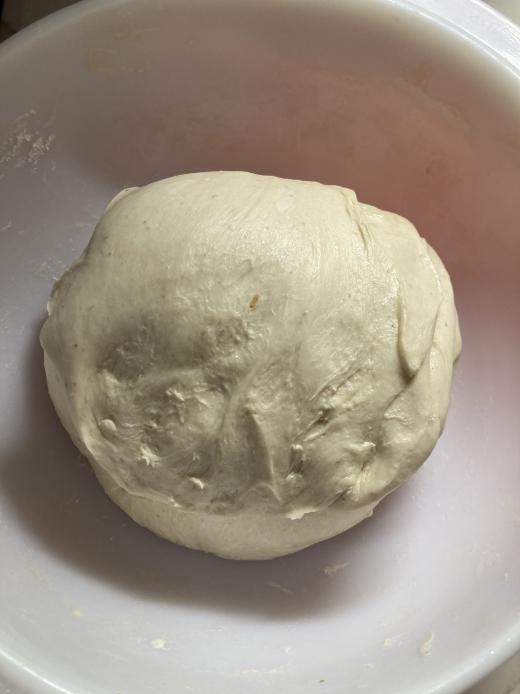
4. Stretch and Fold
After 30 mins, your dough should be a little more relaxed and glossy looking.
Wet your hands, pinch and grab one side of the dough with both hands and pull up. Stretch until you feel some resistance and fold into the center of the dough. Rotate the bowl 90 degrees and repeat the stretch and fold. Continue until you have completed all four sides. You will feel the dough tighten as you go around.
Take the temperature of the dough, you should notice how the thermometor comes out cleaner than before. Use this temperature to gauge how fast or slow your dough will ferment.
Cover and let sit for 30 mins. I like to do this step two more times for optimal gluten development, but one will suffice. The more stretch and folds you do, the better crumb and final shape of your dough.
5. Bulk Fermentation
Leave your dough covered on the counter for 12-13 hours (overnight) after you start step 2.
6. Scrape
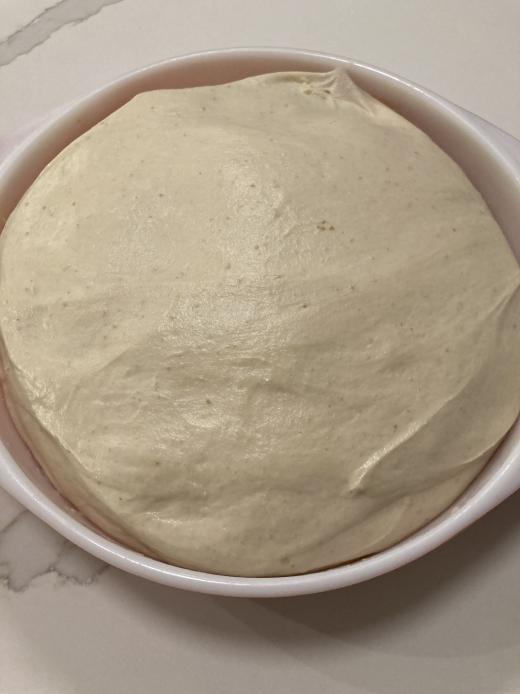
In the morning, your dough should look smooth and have both large and small bubbles on the surface. It should have risen 50%.
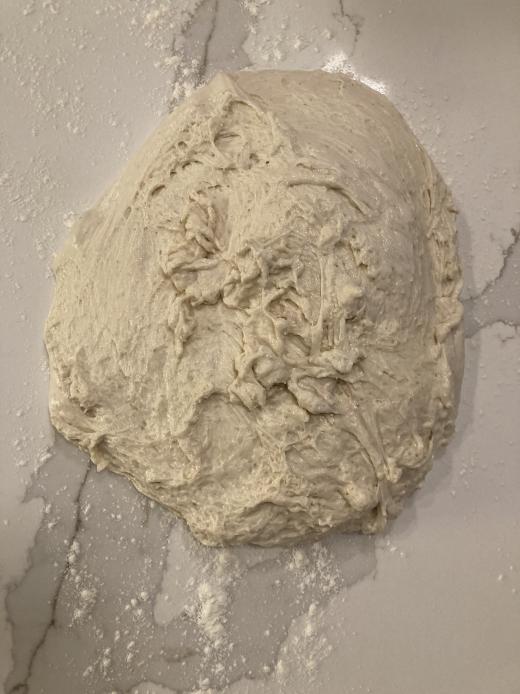
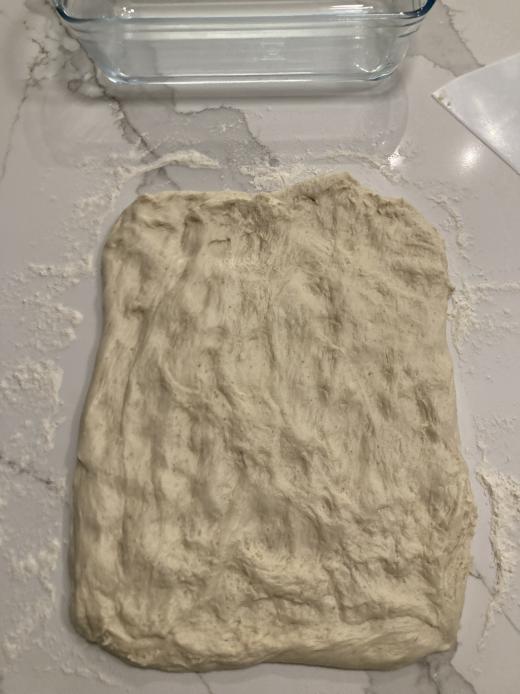
Lightly flour your counter and scrape your dough out of the bowl. Let sit for 15 minutes.
7. Proof (second rise)
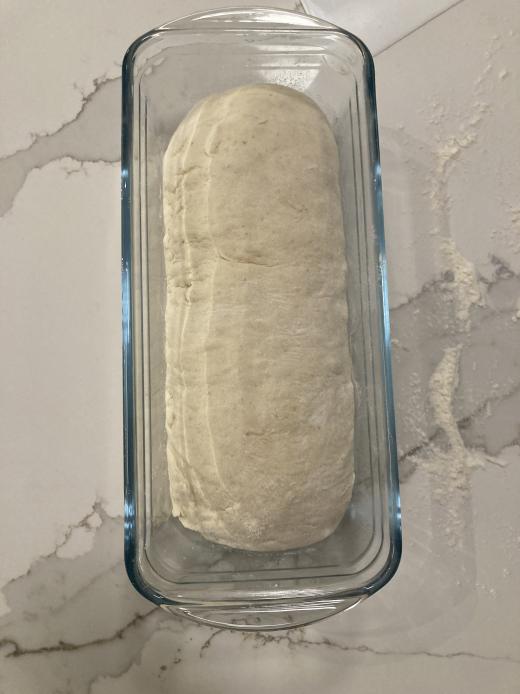
Grease the inside of your loaf pan and set it at the top of your dough. Gently shape the dough into a rectangle and pull the dough to the width of your loaf pan. Roll up the dough and place seam side down in loaf pan. Cover with a damp dish towel and let sit for about 4 hours.
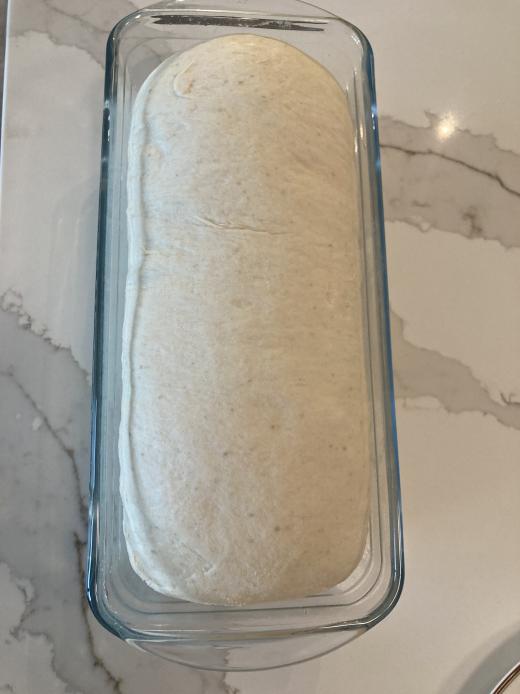
The dough will have risen well above the rim of the loaf pan. If you poke the dough, it should very slowly rise back. If you don’t properly proof at this stage, your finished loaf will tear on the sides and break its shape. This stage ranges anywhere from 2 to 6 hours. The number one issue with this loaf is not letting it proof long enough.
 |
 |
8. Bake
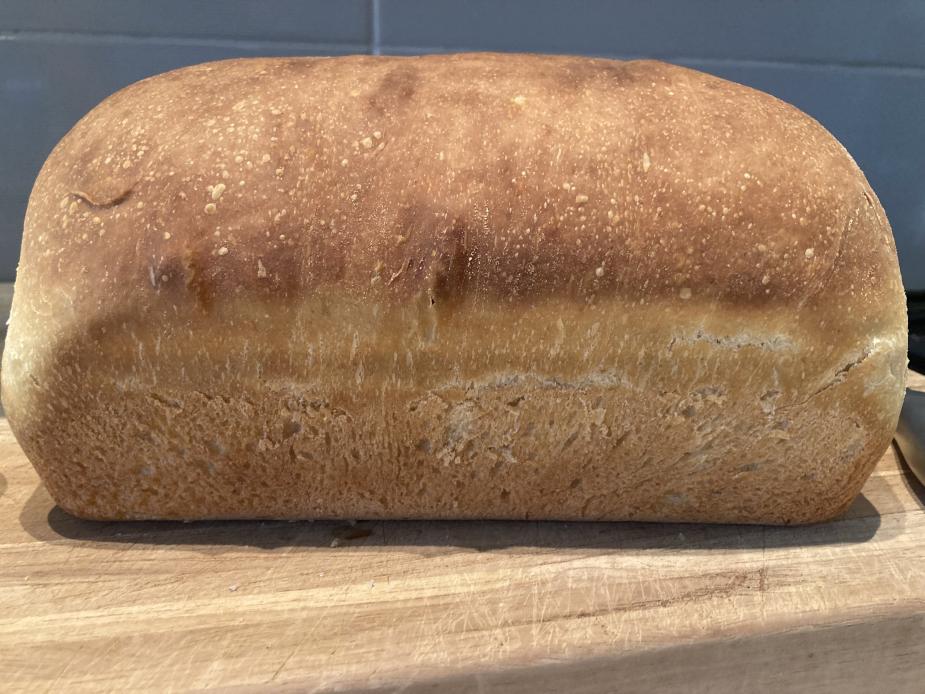
Preheat oven to 400 degrees. Bake for 35 minutes or until golden brown. Let sit in pan for 10 minutes after baking. Remove from loaf pan and let sit for at least 1 hour before slicing.
- 1 loaf
- 23 hours
- 35 minutes
Ingredients
Starter (Leaven)
- 10 g rye flour
- 70 g all-purpose flour
- 80 g starter
- 80 g filtered water
Dough
- 90 g starter
- 270 g filtered water
- 1 tablespoon honey
- 2 tablespoons butter (softened)
- 450 g bread flour
- 10 g salt
Tools
- Scale
- Mixing bowl
- Plastic scraper
- Dish towel
- Loaf pan
Directions
Starter
- Feed starter. Mix 10g rye flour, 70g all-purpose flour, 80g starter, 80g filtered water.
Dough
- Make dough. Measure and mix water, starter, and honey in a mixing bowl until fully combined. Add bread flour and mix. Dough will be shaggy. Cut softened butter into cubes and work into dough until dissolved and fully incorporated. Add salt to top, cover with lid or damp towel and let sit for 1 hour.
- Autolyse. Mix salt into dough and let sit for 30 minutes.
- Stretch and fold. Perform a stretch and fold and let sit covered for 30 minutes. Repeat step up to two more times.
- Bulk fermentation. Leave dough covered for ~12-13 hours (overnight) after your start step 2.
- Shape. Grease the inside of loaf pan. Gently shape dough into a rectangle and pull to the width of your pan. Roll up dough and place seam side down. Cover with damp dish towel and let sit for 2 hours.
- Bake. Preheat oven to 400°F. Bake for 35 minutes or until golden brown. Let sit for 10 minutes and then remove from pan and let sit for at least 1 hour.
More delicious sourdough recipes
This is one of the many fantastic sourdough recipes available on this blog