Sourdough Bagels
This post may contain affiliate links.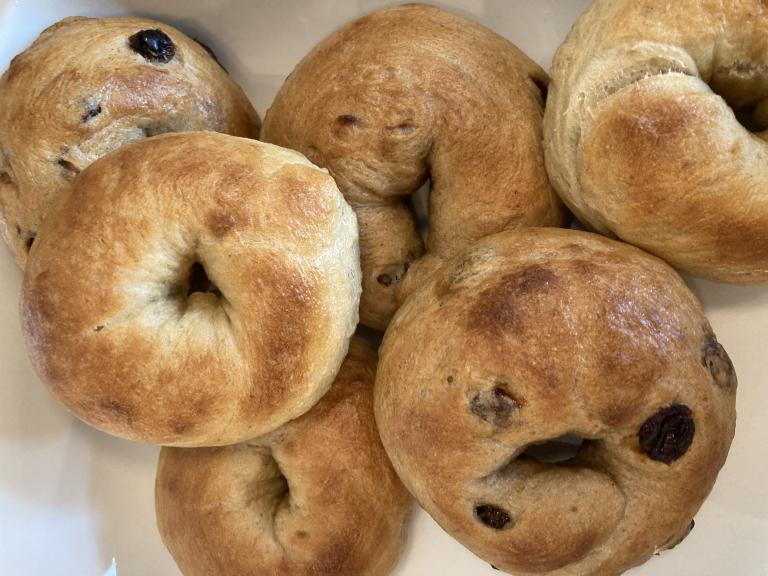
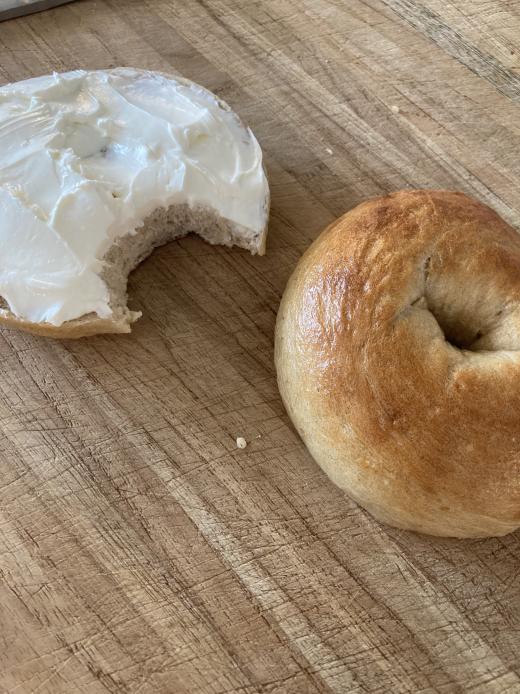
Homemade sourdough bagels are so chewy and delicious! Slather with cream cheese hot out of the oven and you are off to a good day!
I personally only like cinnamon raisin bagels or plain bagel sandwiches so this recipe only includes these two flavors. If you like toppings, like sesame seeds, add them right after boiling so they stick to the top of the bagels when the surface is slightly wet and gummy.
If you are making blueberry bagels, don’t think that you can swap out the raisins for blueberries. They are full of moisture and offset the wet/dry ingredient balance. Try going down to 200g water and adjust from there. You want your bagels to be dense and chewy.
Bagel Proofing
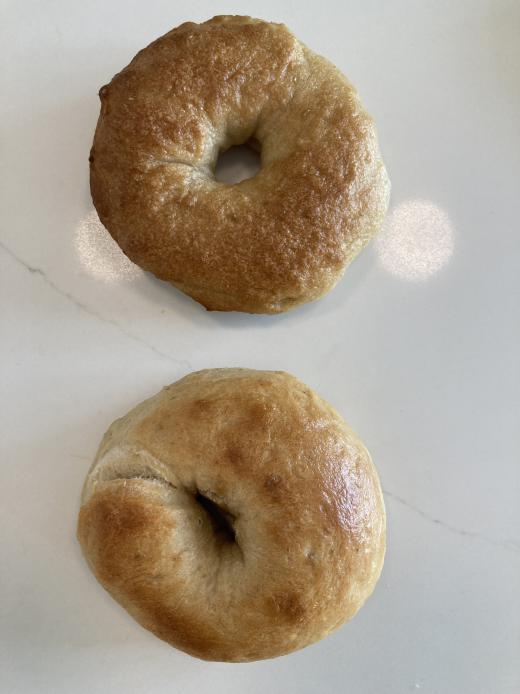
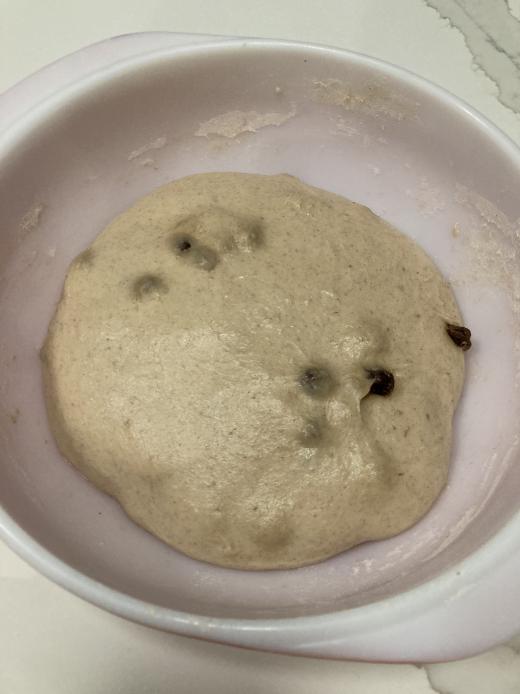
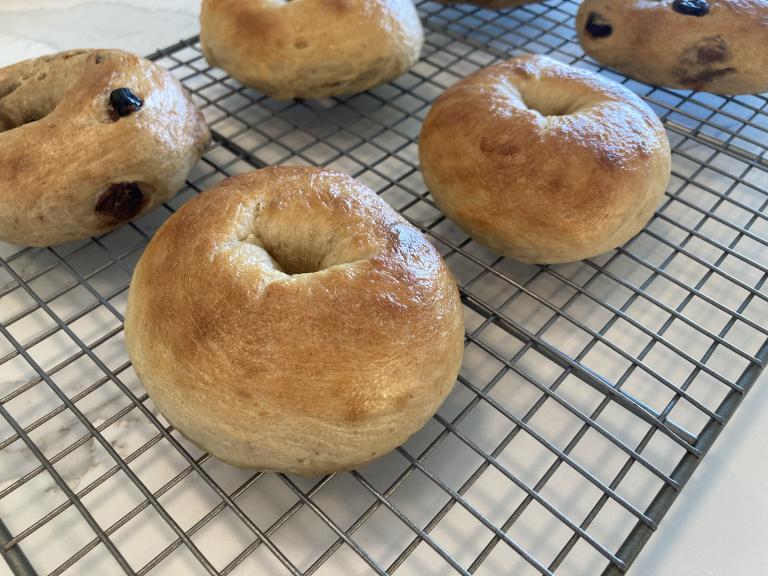
I generally let the bagels proof after shaping for about 30 minutes. This gives me time to preheat the oven and get the water boiling. You can let this go longer but be careful to not overproof. I wouldn’t go past 2 hours. When the bagels are overproofed they are flatter in appearance and have a lumpy bubble surface. The bagel crumb is more open and not the signature chewy dense texture. You can see in the picture below the difference in proofing times. The top bagel was proofed for 4 hours and the bottom bagel was proofed for 30 minutes. The exact same recipe and method was used otherwise. The bottom bagel looks much tastier!
Bagel Boil Mixture
Most bagels are boiled in Lye, but who has that or wants to do that home? Not me! An alternative to this is baking soda since it is a weaker alkaline. Boiling in baking soda will make your bagels have a crispy, dark crust and super chewy texture. I personally don’t like the flavor, it makes the bagels taste too much like pretzels, but to each their own. If you want to try this method then add about a tablespoon of baking soda to 4 cups water. You can mix this will honey/sugar or leave it by itself.
Another option, and the one used in this recipe, is the honey water boil. Honey adds a nice sweet flavor which is ideal for the cinnamon raisin and also leaves a nice golden brown finish. You can swap this out for brown sugar or barley malt syrup and receive similar results.
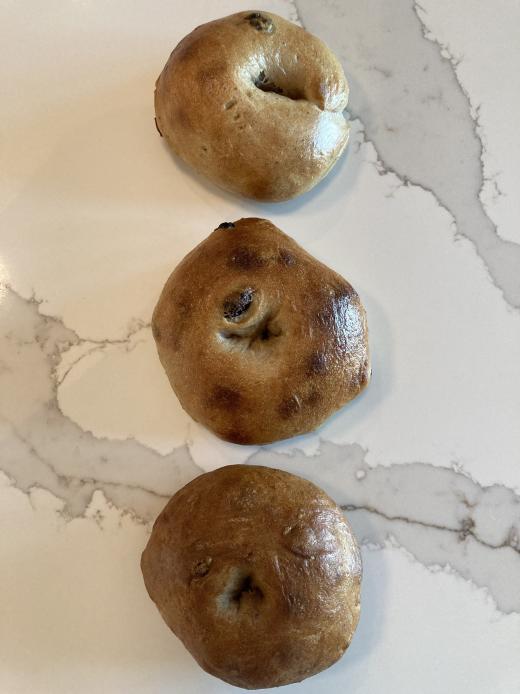
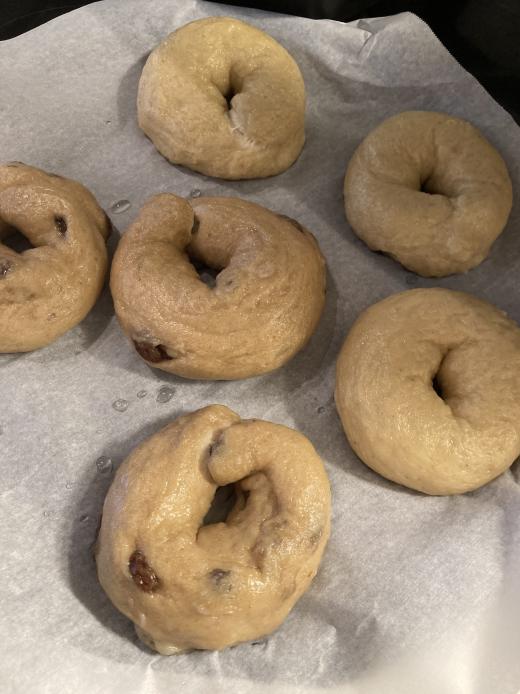
In the picture below you can see the boil mixture comparison. From top to bottom is plain water, honey water, baking soda water. In addition, the top bagel is shaped with the rope and curl method while the other two are shaped with the poke method.
Bagel Boil Times
The longer you boil your bagels the chewier and flatter they will be. Do NOT go longer than 2 minutes on each side or they will be overly chewy. I like bagels to be a little more on the puffy side so 40 seconds to a minute is just about right.
What are the timings?
- 1:00 pm: feed starter
- 7:00 pm: mix dough and autolyse
- 8:00 pm: knead and add raisins
- 7:00 am(next day): shape and second rise (proof)
- 7.15 am: preheat oven and boil water/honey
- 7:30 am: boil bagels
- 7:40 am: bake
Step by Step Instructions
1. Feed your starter
I recommend a 100% hydration starter for this receipe. This means equal parts water, flour, and beginning starter, a 1:1:1 ratio. I feed mine 10g rye, 70g all-purpose, 80g water, 80g starter.
2. Make dough
Get your mixing bowl and add 236g water and 108g starter. Stir well and then add 430g bread flour, 40g brown sugar, and 10g salt. If you are making cinnamon raisin bagels then also add 2 tsp cinnamon and soak 1/2 cup raisins in a cup of water.
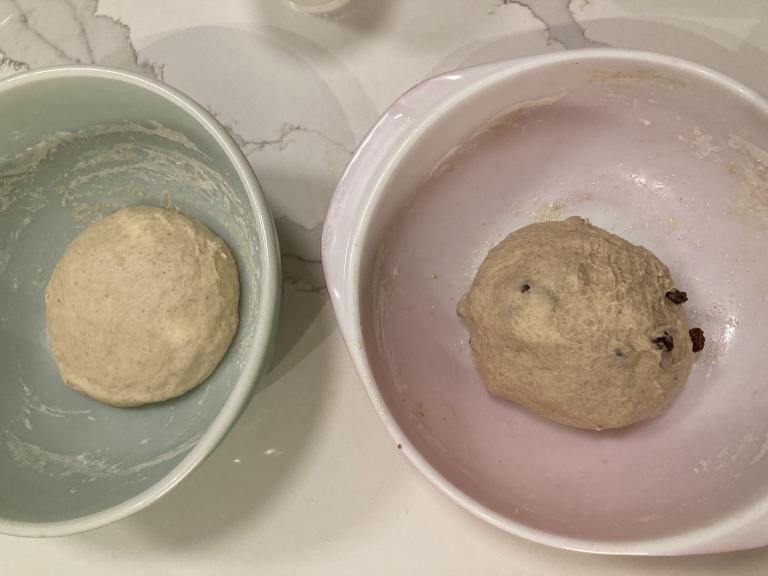
I like to split the batch and make 3 plain and 3 cinnamon raisin bagels in two separate bowls. Simply divide the recipe and have separate mixtures. Keep in mind you will have to knead twice!
3. Autolyse
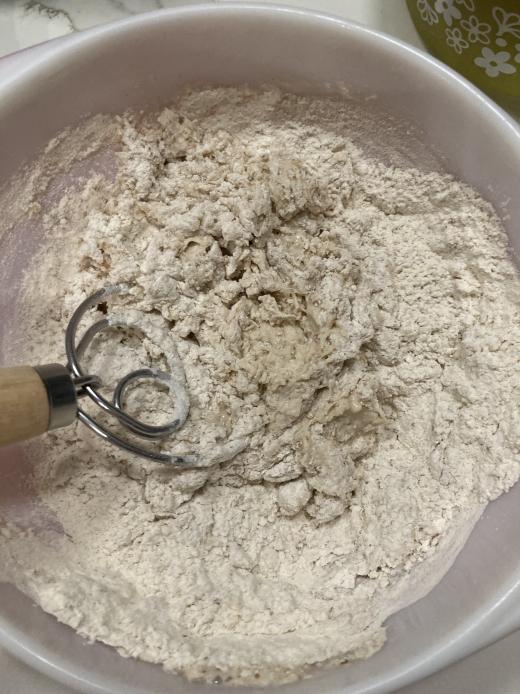
After making your dough it will be very stiff. Cover your bowl(s) with a damp towel or lid and let sit for 1 hour.
4. Knead
Now is time for some hard work! Take your dough out of the bowl onto a clean counter and begin kneading the dough. Working with both hands in unison, push the palms of your hands into the dough and slightly push, stretching the dough. Use your fingers to pull the the dough back towards you and repeat pushing with your palms. Massage the dough in whatever movements seem natural as you continue to press and manipulate the dough. You can do this in a stand mixer for about half the time, but I find it very soothing to feel and work with the dough by hand. Entirely up to you! I switch all the time.
The reason we knead is to develop the gluten strands in our bagel dough. This helps trap air and let the dough rise properly. It also makes sure that all the flour is mixed in. You’ll notice, before you knead, tiny clumps of flour that haven’t fully blended. If we didn’t knead this would limit the rise, texture, and taste of our bagels.
If you are making cinnamon raisin bagels, then drain your soaked raisins and add to the dough. Keep working them in until the dough isn’t wet looking and feeling. Put back into bowl and poke any raisins that are popping out of the surface.
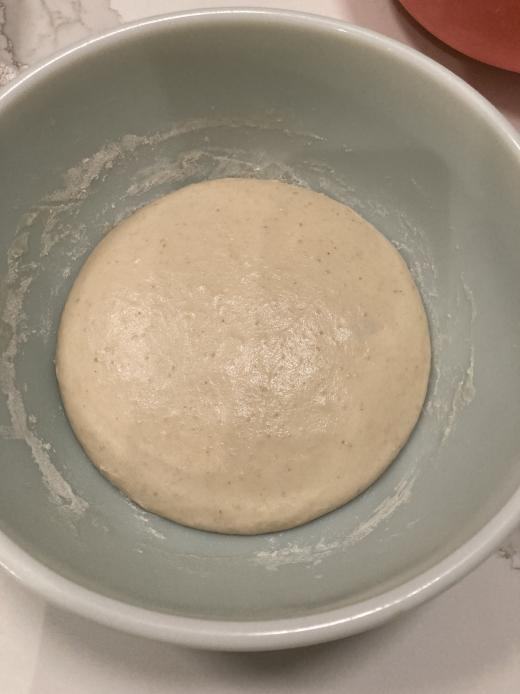
5. Bulk Fermentation
The tough part is done and now just let your dough do its thing in a cozy, warm part of your kitchen. Cover your dough with a lid or damp towel and let sit for about 11-12 hours after you started step 1.
 |
 |
6. Divide & Shape
Scrape dough out of your bowl onto a clean, unfloured countertop. Your dough is pretty stiff so it won’t have issues sticking onto your counter.
Shape into a rough rectangle log, it doesn’t need to be perfect. Use a bench knife and cut 6 individual sections.
Shape each piece into a mini boule. With both hands pinch a small part of dough, slightly stretch up and then down towards the center. Press with your fingertips to seal the fold. Repeat on the opposite side, and then the remaining two sides. Once completed, flip the dough over and shape into a ball. Gently cup your hands arond the dough and in one quick, smooth movement rotate your hands clockwise. Repeat until you have a nicely shaped ball/boule.
Form each piece into a mini boule before performing the final bagel shape. Giving the dough a little time to rest will make it more relaxed and easier to form. You’ll find that if you don’t wait, the dough will shrink back and close your bagel hole.
There are two methods for shaping bagels. I find method #2 to result in more uniform and smoother bagels. If I use method #1, I find myself constantly messing with the bagel shape because one side is bigger or I can’t get the hole large enough. I encourage you to try each method and then continue with the one that works best for you. If you are working with kids, they tend to enjoy #1 the most.
Method #1 – Poke a Hole
Take one mini boule and with your index finger poke a hole through the middle of the dough. Gently pick it up and stick your other index finger through the newly opened hole. Begin small circle movements with your fingers around each other as you gently stretch the dough and increase the size of your circles. Once you are happy with the size of the bagel hole, even out the edges and place on a parchment lined cookie sheet. Go a little larger than you expect on the bagel hole. During the proof and bake, the dough will puff up and the hole will slightly close.
Method #2 – Rope and Curl
With the palm of your hands push down and away on the mini boule. Roll you palms back and forth and then out as you create a long rope. Take both ends and bring them together forming a circle. Stick one end on top of the other and press down to connect the ends. Place on a parchment lined cookie sheet and finish shaping the rest of your bagels. I especially like this method for raisin bagels as it presses the raisins into the dough instead of popping out. I find with method #1 that I sometimes get lumpy looking bagel rings.
7. Proof
Cover your bagels with a damp towel and let sit for anywhere from 20 minutes to 1 hour. I generally go straight from shaping to boil prep but it is up to you to play around with this time. If you find that your bagels are not floating to the top when you boil them, then let them sit for 10 more minutes. This can happen with cinnamon raisin bagels since they are a little denser.
It is okay if your towel touches the bagels since they are generally taller than your cookie sheet. Sometimes I will put blocks on either side to drape the towel so it doesn’t imprint and press on the proofing bagels.
8. Preheat Oven & Boil Water
Preheat oven to 450 degress and bring a pot of 4 cups water to boil. Once the water is boiling, stir in 3 tablespoons honey. You don’t have to add the honey, but I find it helps with the color and flavor.
9. Boil Bagels
Once at a roiling boil, use a slotted spoon or spatula to scoop up a bagel and place puffy side (top side) face down into the water. Nudge with your spatula to make sure it isn’t stuck to the bottom of the pot and help it float to the top if it isn’t already there. Boil for 40 seconds and then flip over and boil for 40 seconds more. I like to use two forks to flip the bagel over instead of the spatula to reduce splashing.
Using your spatula, lift the bagel out of the water and gently shake it to release any water drops. Move back to the parchment lined cookie sheet and repeat with the remaining bagels.
You can boil one or all of them at once depending on your pot size and comfort level. Sometimes it can get overwhelming flipping six bagels in hot water with a time crunch.
If you want to add toppings like sesame seeds or everything bagel seasoning then now is the time to generously sprinkle on top so they will stick to the bagels.
10. Bake
Bake in preheated oven for 20 minutes or until golden brown. Enjoy hot! Bagels aren’t like sourdough bread where you need to wait to cut into them so dive right in!
- 6 bagels
- 18 hours 40 minutes
- 20 minutes
Ingredients
Starter (Leaven)
- 10 g rye flour
- 70 g all-purpose flour
- 80 g starter
- 80 g filtered water
Dough
- 430 g bread flour
- 236 g filter water
- 108 g bubbly starter
- 10 g salt
- 40 g (1/4 cup) brown sugar
Cinnamon Raisin Bagels
- 70 g (1/2 cup) raisins
- 2 tsp cinnamon
Water Boil
- 4 cups water
- 3 tbsp honey
Tools
- Scale
- Glass jar with lid
- Mixing bowl
- Bench knife, plastic scraper
- Parchment Paper
- Pot
- Cookie Sheet
- Slotted Spatula
Directions
Starter
- Feed starter. Mix 10g rye flour, 80g all-purpose flour, 80g starter, 80g filtered water.
Bagel Dough
- Make dough. Measure and mix water and starter in a mixing bowl until fully combined. Add bread flour, salt, and brown sugar. If you are making cinnamon raisin bagels, add the cinnamon at this stage and soak raisins in a cup of water.
- Autolyse. Dough will be shaggy. Cover with lid or damp towel and let sit for 1 hour.
- Knead. Knead dough on counter for 1-5 minutes. Place back in bowl and mix raisins into dough.
- Bulk Fermentation. Leave dough covered for about 11-12 hours after you start step 1.
- Divide Dough. Scrape dough out of bowl onto counter. Shape into a rectangle log. Use a bench knife to divide into 6 equal sections.
- Shape. Shape each piece into a mini boule. Take each boule and either poke a hole through the middle and gently use your fingers to increase the circumference or roll the dough into a rope and then attach both ends to create a circle.
- Proof. Place shaped bagels on a parchment lined cookie sheet or oiled plate and cover with damp towel.
- Preheat Oven & Boil Water. Preheat oven to 450°F. Add 4 cups water to a large cooking pot and boil. Once boiling add 3 tablespoons honey and stir well.
- Boil Bagels. Using a slotted spoon or spatula, transfer bagels to pot and boil for 40 seconds each side, starting with plump side down in water. Transfer to parchment lined cookie sheet once finished boiling.
- Bake. Bake for 20 minutes in preheated oven.
More delicious sourdough recipes
This is one of the many fantastic sourdough recipes available on this blog