Flaky Sourdough Pie & Quiche Crust
This post may contain affiliate links.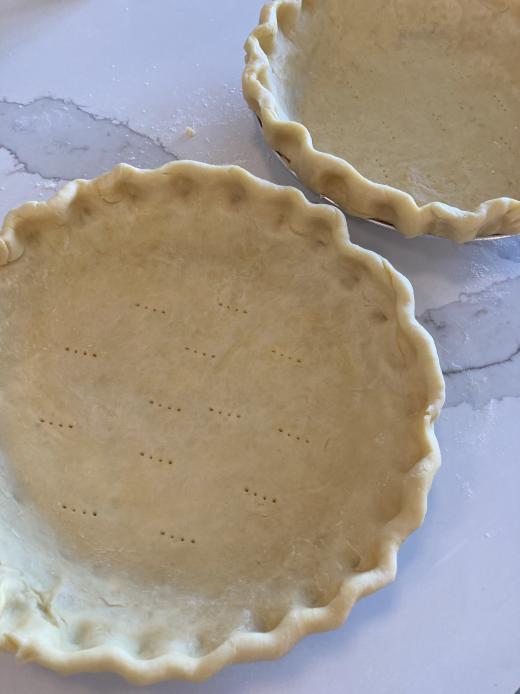
This is the easiest, tastiest, butteriest, flakiest pie crust you will every eat. You won’t believe how simple it is to make and why you haven’t been doing it all these years. Apple pies, quiches, pot pies, banana cream pies, the list goes on an on. This is your general use pastry base for all these delicious treats. The best part, it’s sourdough and can be made ahead of time! Try out my fully packed protein quiche and no sugar apple juice sweetened apple pie!
Pies are very underrated as a dessert. I think most are excessively sweet and weirdly gelatinous. Most pies I swing by at the store are entirely unappealing, but homemade pies are a different story and it all starts with a good crust.
Pie vs. Quiche
Okay so what is the difference between a pie and a quiche. There really isn’t one, especially when it comes to the crust. Quiche crusts can contain eggs and are filled with some type of savory egg mixture. Pie crusts can be sweetened with sugar, and are either sweet or savory (mostly sweet). Unlike a quiche, pies can have a top crust for those juicy fruit pies or meat pot pies.
Pie top crust
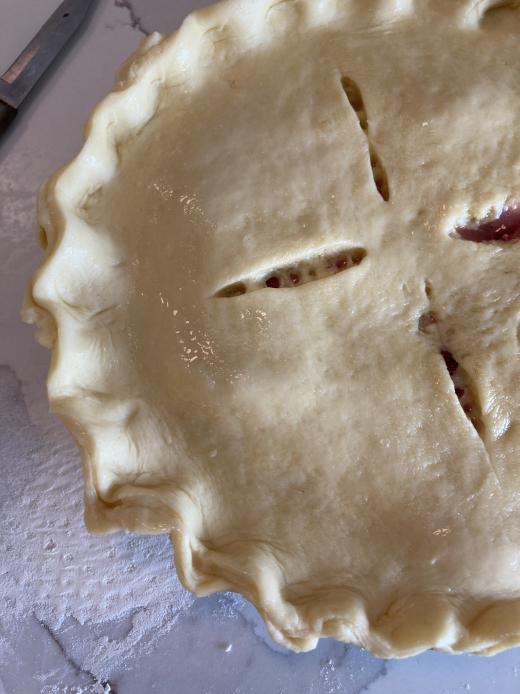
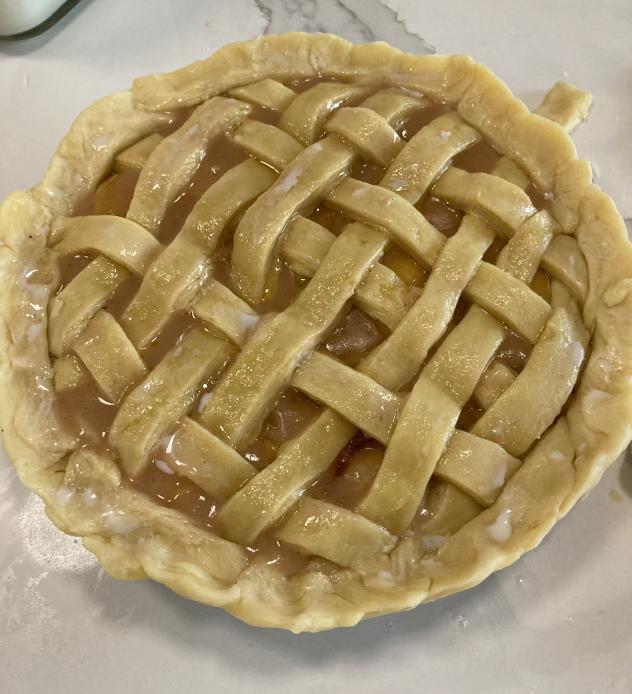
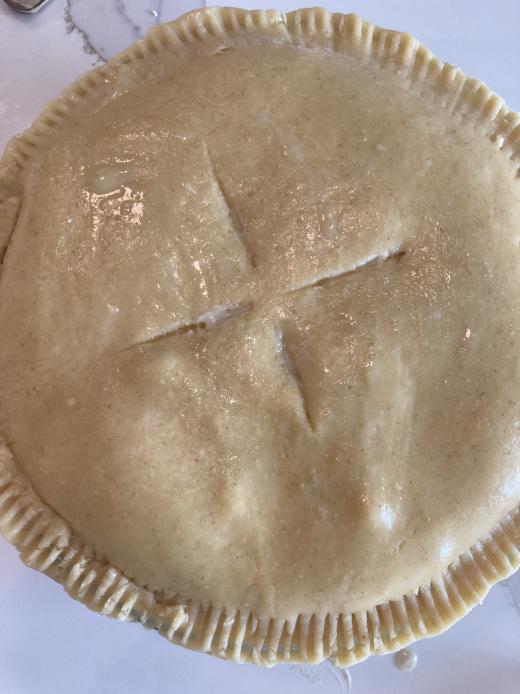
For a top crust simply double the recipe. There are different variations from a full top crust to a lattice crust. If you are doing a full cover top crust, make sure you cut slits in the top in order to vent steam during baking. It is also crucial that you really pinch together the edges of the top and bottom layer crust so that the filling doesn’t seep out the sides.
 |
 |
Sugar?
I try my best to limit sugar in most of the food I eat. This pie crust does not need sugar. If you are making a sweet pie, you are really not going to notice that you are missing a tablespoon of sugar in your pie crust. However, if you feel the desire, add about 20g sugar to this recipe and it will be deliciously sweet. Besides added sweetness, adding sugar to the crust will give it a deeper golden color.
Blind Baked, Par-Baked, Unbaked?
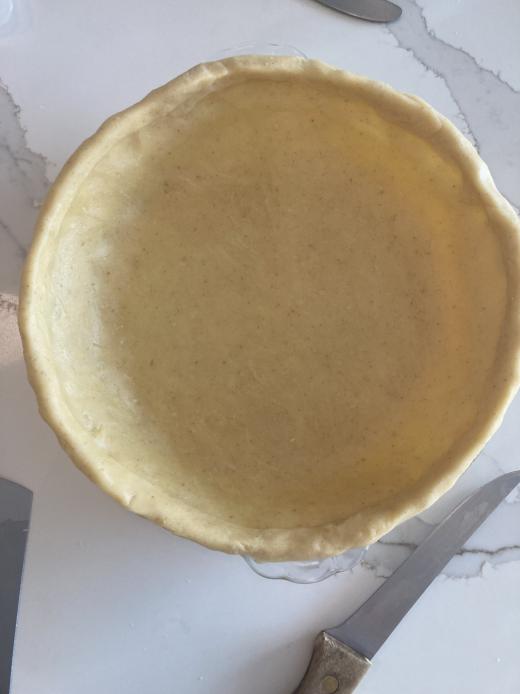
Some recipes will call for a fully blind baked pie crust. This means that the pie crust is fully cooked before any filling is added. You’ll do this for a banana cream pie or a tart, something that sets in the fridge instead of baked.
A par-baked pie crust is partially baked. Par-baked pie crusts are used when the filling will need less time to bake than the crust, like a quiche.
Unbaked pie crust is unbaked prior to filling. This is the most general case for fruit pies or pot pies.
How to blind bake?
There are two major issues with blind baking. First, the crust puffs up from the steam and creates bubbles. Second, the crust sides slide down and don’t retain their shape due to the high fat (butter) content.
The first issue is fixed by “docking” the crust. This technique involves poking holes in the bottom of the crust with a fork before baking.

The second issue is fixed by pie weights to hold up the sides of the pie that would normally be held up by the pie filling. Before blind baking, put a sheet of parchment paper inside the pie crust and fill it to the top with pie weights. Pie weights can be beans, rice, or sugar. I usually like beans since they are always in my pantry and are reusable a few times. If you bake a lot of pies I would recommend reusable ceramic pie weights. They are the best choice and really hold the shape of the crust well. Do not skip this step, I have tried without and you always end up with a pie puddle and it is very dissapointing.

- Step 1. Preheat oven to 400 degrees
- Step 2. Prep pie by docking and adding parchment paper and pie weights.
- Step 3. Bake in preheated oven for 15 minutes.
- Step 4. Remove parchment paper and pie weights and bake for 7 minutes for par-baked and about 15 for fully baked.
If fully baked, let cool before adding filling. Unless specified, you can add the filling to most par-baked recipes and pop straight back in the oven.
Can I freeze the dough?
Yes! Instead of putting the dough in the fridge after it has fermented, you can put it in the freezer. I usually use it within a month, but it can go longer.
The dough should also last in the fridge for a few days, but I don’t like to go past 48 hours. 12-24 is a nice sweetspot otherwise I tend to freeze.
Can I freeze the rolled pie crust?
Yes, you can. Just be careful about the container you freeze it in. I would recommend the throw away foil pie bases if you are going this way. Otherwise, if the base is glass or something that is sensitive to temperature changes, then let the container warm up to room temp or transfer the frozen crust to anther container before baking.
There is no need to defrost the crust before baking or blind baking. In fact, freezing before will allow the crust to set before the butter melts helping the crust retain its structure.
Do I have to let the dough ferment?
No, you don’t. You will miss out on the added benefits, but you can skip the fermentation and go straight from making the dough to putting it in the fridge. You need to do the fridge step in order to have cold dough for a flaky crust.
How to create decorative pie edges
Plain Edge
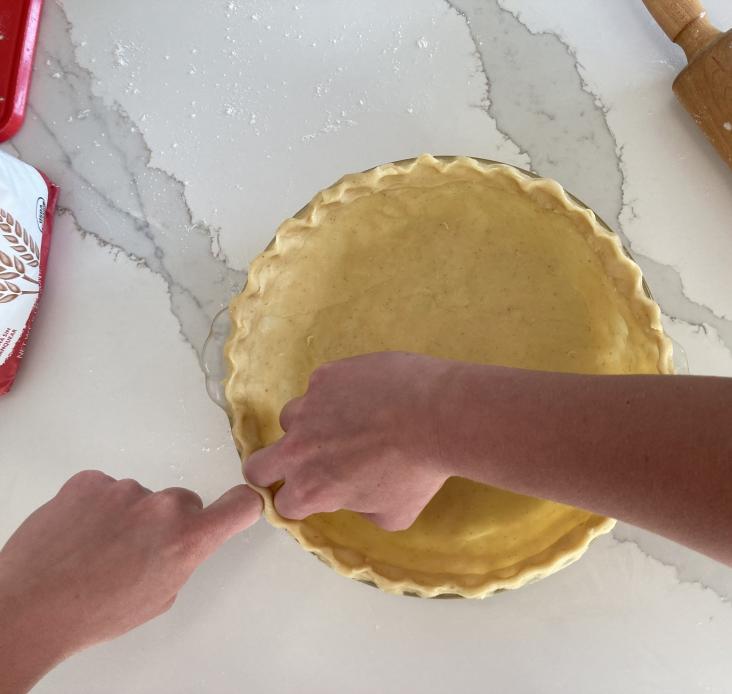
Put your rolled pie crust into your pie base. Cut off any overhang and roll out the pastry that was cut off. Cut into strips and place the strips around the pie edge to create extra thickness. Use your fingers to smooth and combine the edges. The thicker edge will help prevent the pie crust from slipping and prevent the edge from burning before the pie is finished baking.
Forked Edge
The forked edge is great for the double covered pie. It really presses together the top and bottom crust so the filling doesn’t escape. Use a fork and with frim and even pressure, press down on the edge of the pie crust. Continue around the entire pie.
Fluted Edge (my favorite)
I like to use my knuckles for a smoother trim, but you can also use your fingers (both index fingers and thumb). First create a plain edge, then place the index knuckle of one hand on the outer rim of the crust. With your other hand, press the crust from the inside with the knuckles of your index and middle finger. Continue around the entire crust until complete.
Apple Juice Sweetened No Sugar Apple Pie Recipe
You have got to try this! If you are on a war against processed sugar but have a sweet tooth craving this is a pretty great alternative.
- 5 apples
- 2 tablespoons all-purpose flour
- 1 teaspoon cinnamon
- 1/4 teaspoon nutmeg
- 2 tablesppoons butter
- 1-2 cups apple or grape juice (start slow!)
- 1 egg mixed
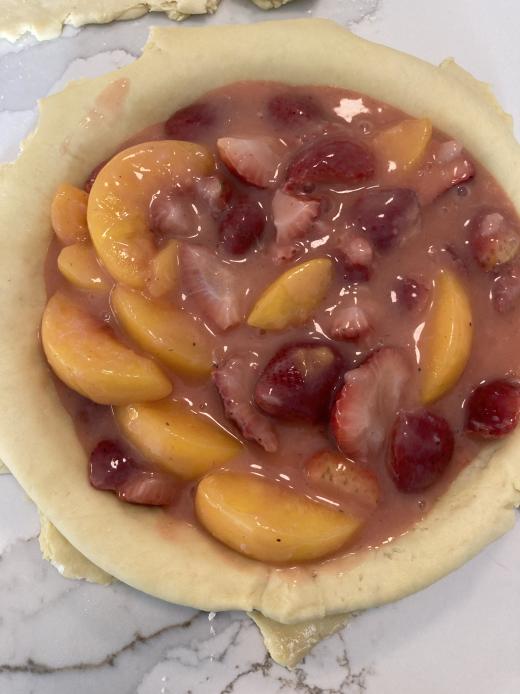
Get about 5 (sweet) apples, not Granny Smith. Peel, core, and finely chop into slices. In a large pot add butter, apples, flour, cinnamon, nutmeg, and 1-2 cups apple juice depending on sweetness level. Boil and then let simmer until thick. Let cool.
Pour mixture into unbaked pie crust, cover with lattice or top crust and brush with egg mixture. Bake in a preheated oven at 450 degrees for about 45-50 minutes.
My grandma would always say bake the apple pie until you hear its heartbeat, like a big thwomp. I have only gotten this once or twice in my life but the pies have been perfect when this happens.
You can swap this out for grape juice if you want it to be even sweeter! I also use this recipe and swap out the fruit depending on the season. Strawberry peach or strawberry rhubarb are some of my favorite alternatives!
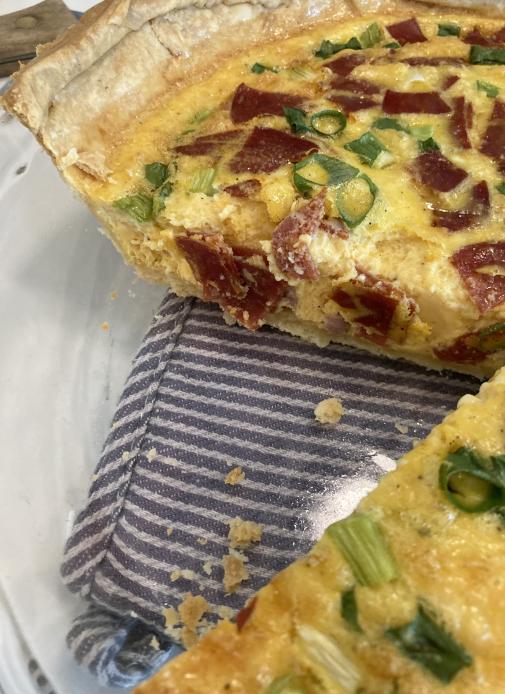
My Hearty Quiche Recipe
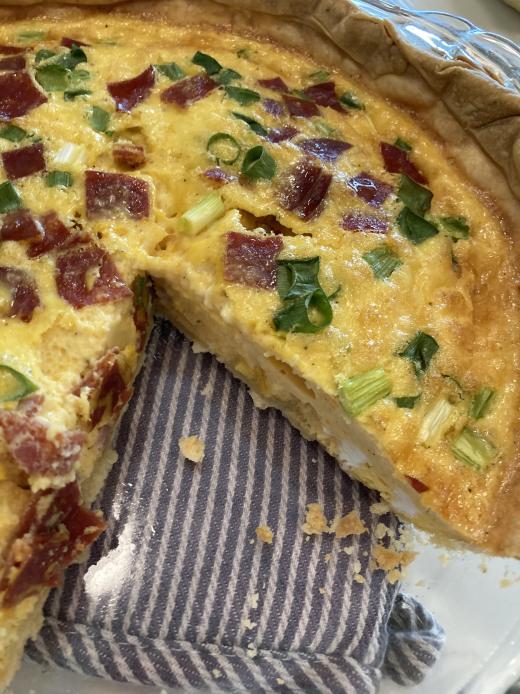
This is my super easy and fast quiche recipe. It is not the custard style quiche with one or two eggs… this recipe is not for you if you want that. It is your full protein style quiche that will make you and your family full and happy.
- 10 eggs
- 1/2 cup cheddar or mozzarella cheese (I normally do a combo if I have it)
- 1/4 cup cream
- 1 teaspoon salt
- 1/4 teaspoon pepper
- 1/2 cup chopped ham or turkey
- 4 green onion stalks chopped
- Pepperoni toppings (for some reason I always have this leftover and it makes for a delicious topping)
Mix ingredients and pour into a par-baked pie crust, top with optional pepperoni and a sprinkling of any remaining chopped green onions. Bake 350 degrees for 35-40 when fork comes out clean. For the last 5 minutes I am literally opening the oven door all the time so you are not alone. Catching the quiche right when it sets makes it really nice.
 |
 |
Step by Step Instructions
What are the timings?
- 8:00 am: feed starter
- 12:00 pm: make dough
- 6:00 pm: knead and put in fridge
- 8:00 pm:(and after) roll and bake
1. Feed your starter
Use a 100% hydration starter. Feed it equal parts water, flour, and beginning starter. Mix 10g rye flour, 40g all-purpose flour (or 50g all-purpose instead of rye), 50g starter, and 50g filtered water.
2. Make dough
Measure 150g all-purpose flour and 2g (pinch) of salt. Mix together in a large bowl.
Cut 7 tablespoons butter into small cubes over flour. Use your hands or a food processor to mix the butter in, it will begin to soften from the warmth of your hands and turn into small pea-sized pieces.
Add 65g starter and combine with your hands until all the dry ingredients come together. If you find the mixture to still be dry, add a little more starter.
Cover with a damp towel and let ferment for about 6-7 hours. If you want to use the dough quicker, skip the ferment and go straight to the next step.
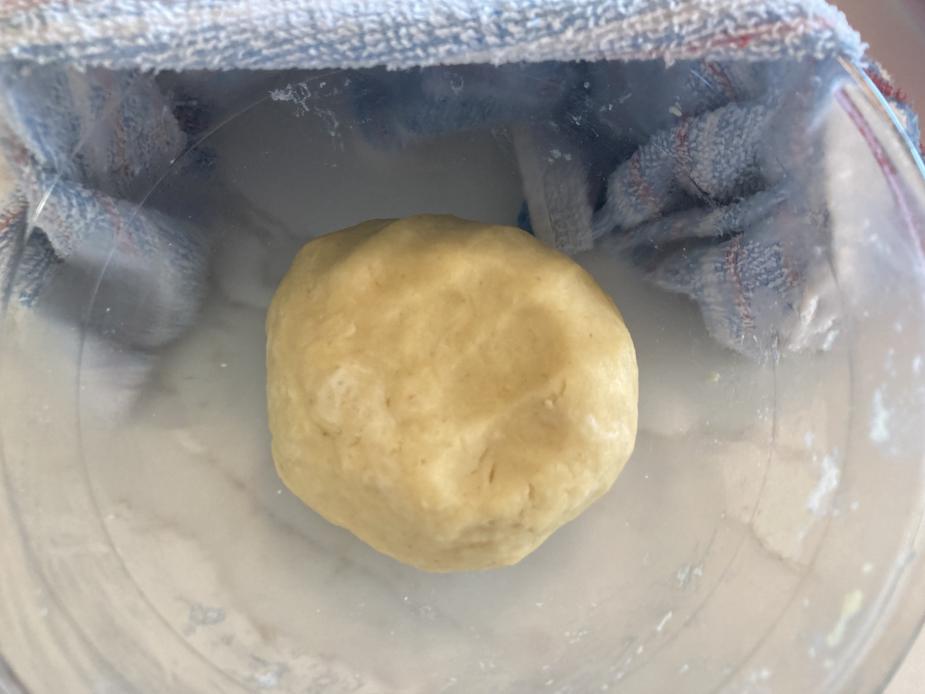
3. Fridge
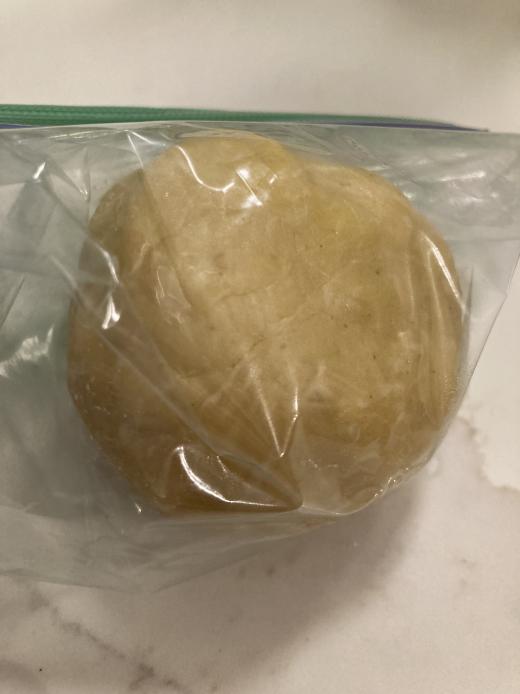
After the bulk ferment, take the dough out of the bowl and lightly knead in the air for about 15 sections forming the dough into a flattened rectangle. Place it in a plastic bag or wrap it in plastic wrap and pop in the fridge for at least 2 hours until cold all the way through. You can let it sit for up to 48 hours, but I generally use the dough at 12-24 hours. Cold dough creates the desirable flaky buttery smooth crust.
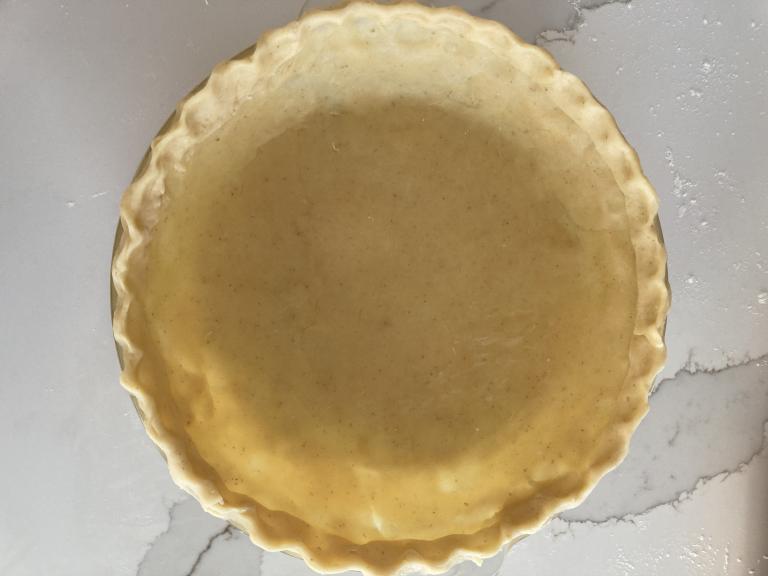
4. Roll
On a lightly floured surface use a rolling pin to roll out your dough into a thin circle shape. You will want it slightly larger than the width of your pie base to cover the depth as well. Add flour as needed if your pin is sticking.
When you are ready to transfer your dough to your pie base, furl the dough around your rolling pin to carry it over to the pie base and unwrap.
Press dough down into the bottom and edges of the base so there are no pockets of air.
5. Create Pie Edges
With a knife, cut the dough overhang leaving about a half inch remaining around the entire pie.
Form the cut dough into a ball and then reroll the dough back out into a long rectangle shape. Cut the dough into strips and place around the edges of the pie crust. Use your fingers to form the circumference of the pie into a smooth ropelike edge.
This technique will create a thicker edge to keep the sides from falling while baking and prevent premature burning since it will take a little longer to bake through.
Add a decorative trim or leave as plain pie edge.
6. Bake
Depending on the type of pie or quiche being prepared, blind bake or fill and bake pie.
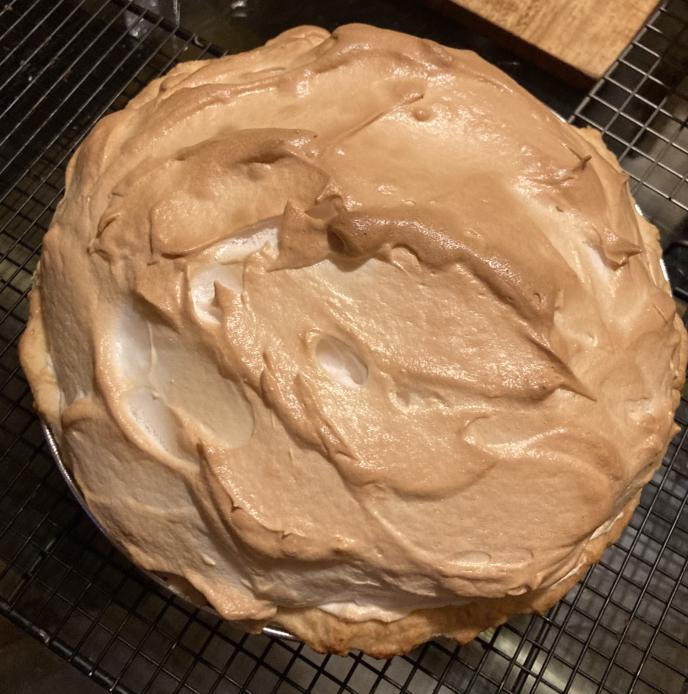
This is a Lemon Meringue Pie that was par-baked prior to being filled. The lemon filling and sourdough crust is an exquisite combo.
- 1 9" pie crust
- 12 hours
- 25-45 minutes
Ingredients
Starter (Leaven)
- 10 g rye flour
- 40 g all-purpose flour
- 50 g starter
- 50 g filtered water
Pie Dough
- 150 g all-purpose flour
- 65 g bubbly starter
- 2 g (pinch) salt
- 7 tbsp butter (cold)
Tools
- Scale
- Glass jar with lid
- Mixing bowl
- Rolling Pin
- Parchment Paper
- Ceramic Pie Weights
- Pie Base
Directions
Starter
- Feed starter. Mix 10g rye flour, 40g all-purpose flour, 50g starter, 50g filtered water.
Dough
- Make dough. Measure flour and salt and add to bowl. Mix until mostly combined. Cut small cubes of cold butter over mixture. Knead with hands or food processor until butter is completely mixed and you have small pieces. The butter will soften as you knead. Add starter until dry ingredients come together to form a ball.
- Bulk Fermenation. Cover dough with lid or damp towel and let sit for 6-7 hours.
- Light Knead. Take the dough in your hands and lightly knead for about 15 seconds. Shape into a flattened rectangle.
- Fridge. Place dough in plastic wrap or plastic bag and let sit in fridge for at least 2 hours and up to 24 hours.
- Roll. Use a rolling pin to roll dough into a flat circle. Lightly flour rolling pin if sticking to dough.
- Place in Pie Base. Wrap rolled dough around rolling pin to carry to pie base and unroll. Press into sides of base.
- Create Pie Edges. Cut off overhang of pie crust. Shape into a ball and roll again. Cut into strips and place around edges of pie. Smooth edges and create desired decorative pie edge.
- Bake. Blind bake or fill with pie filling and bake.
More delicious sourdough recipes
This is one of the many fantastic sourdough recipes available on this blog