Easy Overnight Beginner Sourdough
This post may contain affiliate links.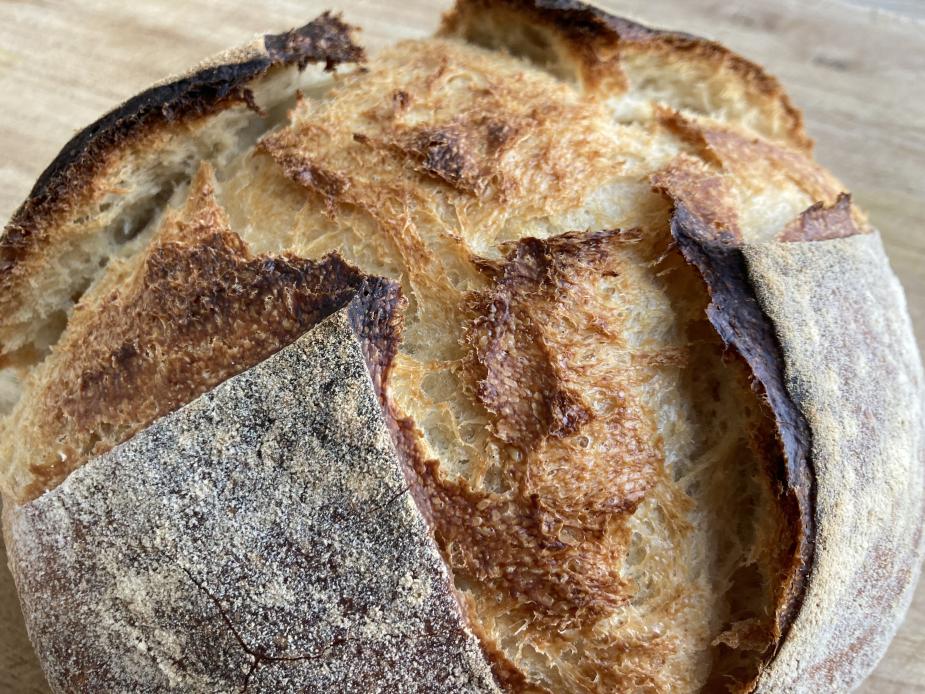
This overnight sourdough is very basic and easy to make for a beginner. Sometimes you don’t have time to make that perfect artisanal loaf, but you still want a great tasting bread in the morning!
If you are a beginner and just learning the ropes, this recipe is for you! It will help you get the steps down before you try my classic sourdough recipe.
I remember when I first started making sourdough, I was so confused on how to handle the starter, timings, and the difference between bulk fermenation and a proof. Stripping back to the basics can help you get the hang of things and understand how sourdough works before adding the stretch and folds, coil folds, lamination, cold proofs and so on.
This loaf has a very low hydration at 60%. Sourdough hydration is the ratio of water to flour. You can learn more about sourdough hydration levels here. Lower hydration is much easier to work with, shape and great for beginners. As you become more experienced you can start increasing the amount of water you use.
Since this is a counter overnight ferment, if we add too much water you will end up with a massive batch of smelly vinegary sourdough, not ideal for a good loaf. Ideally, we can do a cold retard which involves proofing our bread in the fridge overnight. The cold temperatures slow down the fermentation and make for a better flavor and crumb. For this recipe we are going to make it super simple and skip this method.
Tips
- If your schedule prevents you from baking in the morning, you can cold proof your dough and bake later. During the proof, place your banneton in the fridge and take it out later in the day when you are ready to bake.
- If you are using a bowl with tea towel, lightly mist the tea towel before dusting with flour to make it stick better.
- Use rice flour to dust your banneton. It doesn’t absorb moisture as much as wheat flours do. I keep a bag in the freezer. This aids in the flour sticking to the banneton liner when dusting, but not the dough during the proof.
What are the timings?
- 12:00 pm: feed starter
- 7:00 pm: mix dough
- 8:00 pm: light knead
- 7:00 am(next day): shape and proof
- 8:00 am: preheat
- 8:30 am: bake
Step by Step Instructions
1. Feed your stater.
The first thing you need to do is feed your starter. If it has been in the fridge, let it sit on your counter and warm up for a few hours before feeding. If your starter has been in the fridge for more than a few days I would recommend giving it a feeding before making bread. You want it active enough to rise the dough.
Now if you want to make a really lazy sourdough and you have fed your starter within 48 hours you can take it out of the fridge at noon and use that for the dough. This surprisingly still makes a fantastic loaf and sometimes there just isn’t enough time in the day.
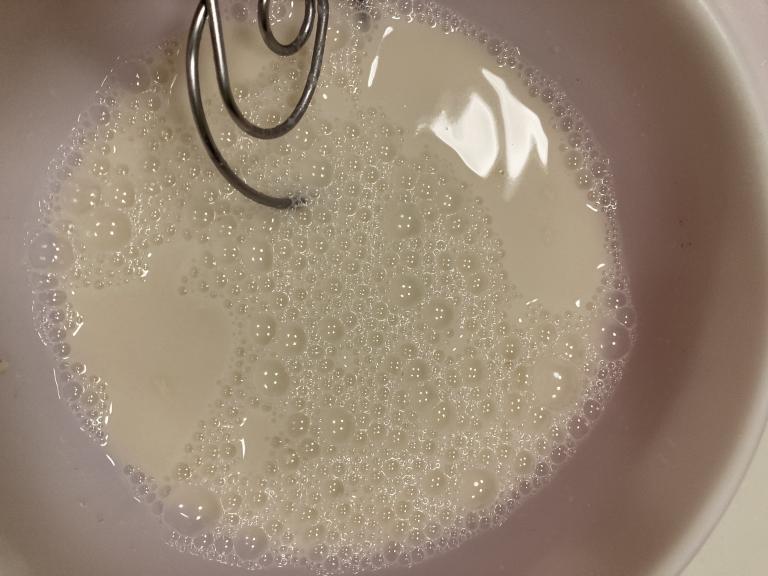
For this recipe we need 86g of starter. We also need to have enough starter remaining so that we can refeed it and use it in the future. I generally like to have about 50g leftover to feed. When transferring the starter, you lose a bit that you can’t get out of the jar. This comes out to about 15g. Adding all these up, we need about 150g starter in order to make this recipe and refeed. Based off this number, you need to feed at least 50g starter, 50g water, and 50g flour. This is the bare minimum. I like to give myself some leeway and feed a 1:1:1 ratio of 70-80g each. For this recipe take out 70g starter and add 70g filtered water, 60g all-purpose, and 10g rye. You can swap out the rye for all-purpose, but I like the rye if you have it. Let sit on counter for 5-6 hours until bubbly and doubled in size.
2. Make dough.
Get a large bowl and set it next to your scale, this will be for your dough. Get another bowl or small cup and place it on your scale. Measure 260g water and 86g starter. I measure the starter with the water in the bowl because you can get the exact starter amount without it sticking to the sides. You can also make sure that it floats. If it does, your starter is ready to make bread.
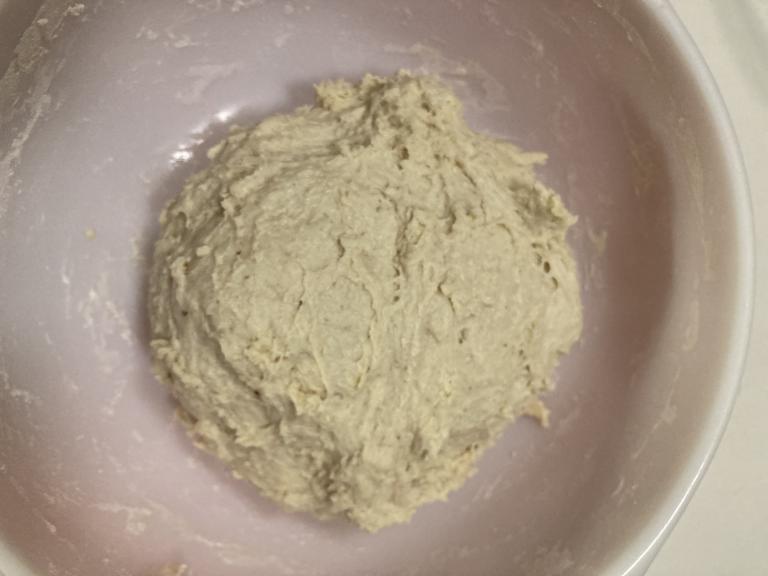
Pour the water and starter into your large bowl and mix until milky. Get another bowl and measure 430g bread flour and 10g salt. Pour into wet mixture and combine until formed a sticky loose ball.
Cover with lid or damp towel and let sit for at least 30 minutes. An hour is preferred if your schedule allows.
 |
 |
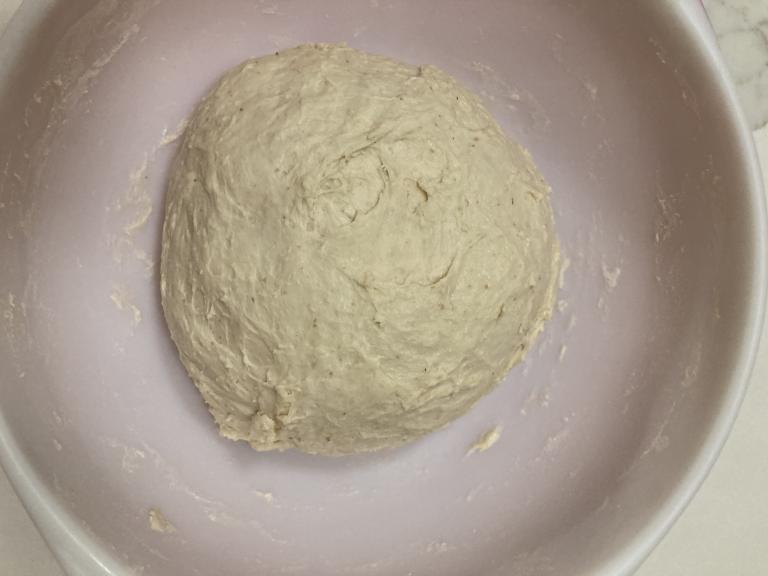
3. Knead.
Take the dough out of your bowl and lightly knead in the air for about 15 seconds until the dough is more smoothe and spherical. Your goal is to make the dough tighter and incorporate any dry parts that weren’t mixed in. Place back in bowl and let sit covered for 11-12 hours overnight.
4. Shape.
Scrape the dough out of your bowl onto a clean, lightly floured counter using a plastic scraper or a cupped hand in confident movements. During the shaping stage it is important to make thoughtful, confident, and determined movements. If you hesitate or are unsure, the dough gets sticky and relaxes in shape. As you move to higher hydrations this will become more important. Move with purpose in each step.
 |
 |
We are now going to perform a letter fold. Using both hands take the side opposite you and pinch and pull it towards the center making a fold. Do the same with the side closest to you by pulling and folding towards the center. Repeat with the two remaining adjacent sides.
Wipe away any flour on your counter and flip the dough over onto its belly. Cup the dough with your hands or use a bench knife and in smooth circular movements shape into a nice ball. This shape is called a boule.
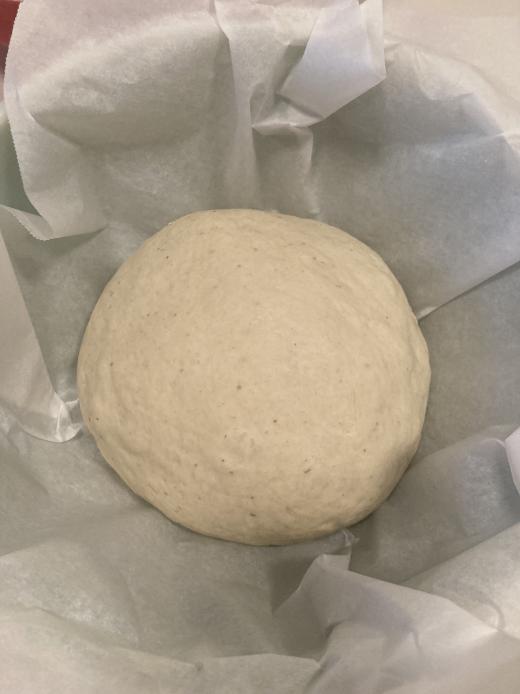
5. Proof.
Lightly flour a banneton basket or a bowl lined with a tea towel. Flip your boule with a bench knife or hands and place it belly side up into your banneton. Cover with a dish towel, lid, or plastic shower cap and let sit for at least an hour.
This proof is also called the second rise and will take about 1 - 3 hours. It should increase in volume and puff up nicely. We rise the dough twice in order to get a better gluten structure for more even crumb and better texture and crust. As you develop your skills and move onto other recipes you will notice the importance of this step as well as taking in the change of your environment to adjust this time.
6. Preheat.
Preheat oven to 500 degrees with dutch oven and lid inside. While your oven is preheating, your dough will continue to proof so keep that in mind to avoid overproofing your dough.
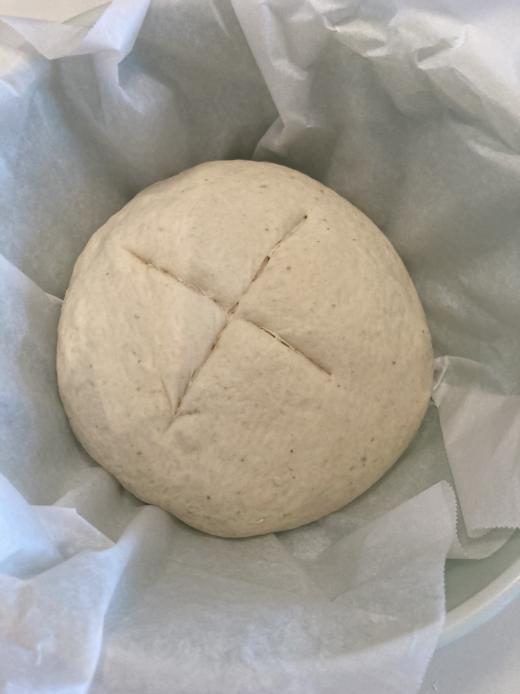
7. Score.
Once the oven is preheated, flip dough out of proofing container onto a piece of parchment paper. Use a knife to score the top of your dough about a quarter of an inch deep. You can make one slash or a cross depending on your preference.
8. Bake
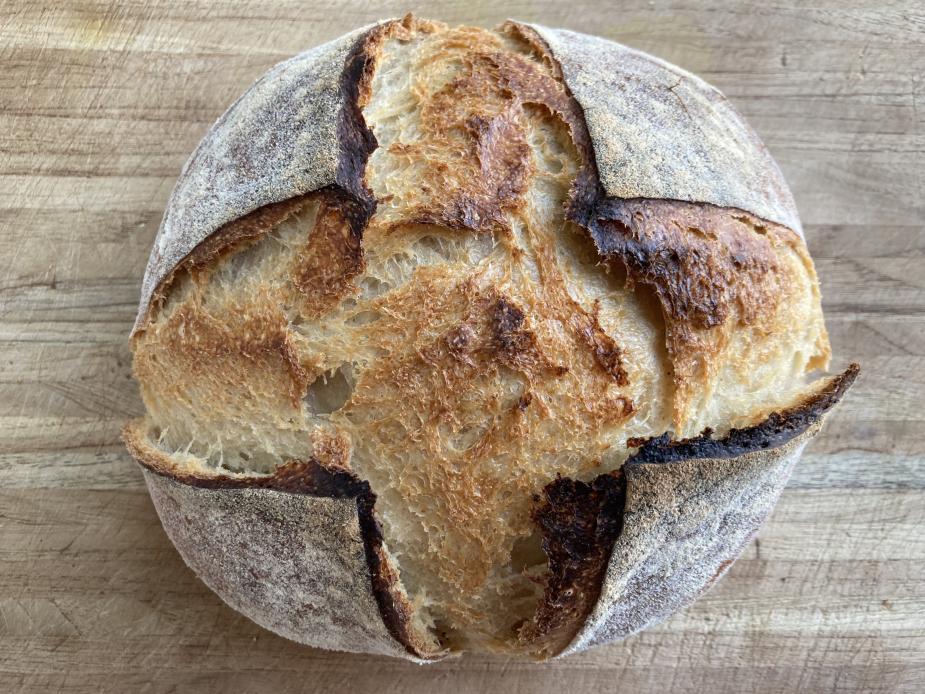
Turn oven down to 450 degrees. Carry dough in parchment paper and place directly into dutch oven. Cover with lid and bake covered for 20 minutes. You can use a spray bottle to spritz the dough with water before putting the lid on. This will create steam that will keep the dough moist during the baking so that the crust doesn’t form too early and split in the wrong places.
After 20 minutes, remove the lid and bake uncovered for 20-25 minutes until brown.
Remove from oven and let sit for at least an hour before slicing. You need to give your bread time to set its flavor and release steam so your crumb isn’t doughy.
- 1 loaf
- 13 hours
- 40-45 minutes
Ingredients
Starter (Leaven)
- 10 g rye flour
- 60 g all-purpose flour
- 70 g starter
- 70 g filtered water
Dough
- 430 g bread flour
- 260 g filter water
- 86 g bubbly starter
- 10 g salt
- (optional) rice flour for dusting banneton
Tools
- Scale
- Glass jar with lid
- Mixing bowl
- Shower cap, plastic bag, or damp dish towel
- (optional) Bench knife, plastic scraper
- Banneton or bowl with dish towel
- Parchment Paper
- Dutch oven
Directions
Starter
- Feed starter. Mix 10g rye flour, 60g all-purpose flour, 70g starter, 70g filtered water. Let sit on counter for 5-6 hours until bubbly and doubled in size.
Dough
- Make dough. Measure and mix water and starter until fully combined in a large bowl. Measure flour and salt and add to bowl and mix. Dough will be sticky.
- Cover dough. Cover dough with lid or damp towel and let sit for 30 minutes to 1 hour.
- Light Knead. Take the dough in your hands and lightly knead for about 15 seconds until the dough is tigher in a ball shape.
- Bulk Fermentation. Cover dough with lid or damp towel and let sit for 11-12 hours overnight.
- Shape. Scrape dough out of bowl onto clean, floured countertop. Perform a letter fold and shape into a boule.
- Proof and Preheat. Place dough seam side up in banneton basket and let sit covered for at least 1 hour and up to 3.
- Preheat. Preheat oven to 500°F with dutch oven and lid inside.
- Score. Once oven is preheated, flip dough out of banneton onto parchment paper and score the top about a quarter of an inch deep.
- Bake. Carry dough in parchment paper to dutch oven. Cover with lid, turn oven down to 450°F and bake covered for 20 minutes. Remove lid and bake uncovered for another 20-25 minutes until brown.
More delicious sourdough recipes
This is one of the many fantastic sourdough recipes available on this blog